Monday, December 12, 2011

MUSTANG COBRA II ROUSH RACING MARLBORO 1995 DAYTONA


It has been awhile.

It’s a case of work too much and play as much.


Seldom we see anything like this American muscle plying its trade on the other side of Atlantic. I was happy to help my friend in Hong Kong to realize such a rare model. 

This car finished fifth in GTS-1 Class and 16th. overall.


Prepared and tuned by Roush Racing team.


However, it was somewhat overshadowed by the class winner, Mustang Cobra’s Nobody’s Fool. Yes you guessed it, co-driven by its leading actor, Paul Newman.


 The car 65 is a complete Puerto Rican team. It was officially driven by Wally Castro, Axel Rivera and Rolando Falgueras. Manolo Vila and Biagio Parisal were also listed to run.

 Let’s have another look on Puerto Rico, or specifically San Juan.
Couldn’t be complete without mentioning about the recently completed Puerto Rico Tip-Off Classic.


Bama emerged a worthy winner. Despite two recent losses, they can be good, who knows if they can even emulate their cousins' second chance story on the gridiron.


Tuesday, July 12, 2011

LANCIA DELTA HF MARLBORO TRELLES 1990 SAN REMO RALLY


Perhaps one of the best drivers who are not given opportunity to prove his worth in Group A.


Gustavo Trelles made Spain his base and employed by Lancia Espania as works driver.


Four Group N crowns were achieved through Mitsubishi, though

Monday, May 16, 2011

TOYOTA CELICA GT-FOUR ST205 MARLBORO JUHA KANKKUNEN 1997 EL CORTE INGLES

One of the best Marlboro liveried ST-205.


Eventually finished 3rd behind Puras' ZX Kit Car and Thiry's Escort Cosworth RS.
Both made this edition of Rallye Corte Ingles, one of the most closely contested ever.


Great decal I got from Spain, but comes without Shell and Publistas logos. Decal is a bit aging, and tend to be brittle. For that, I have to spray thin layer of clear lacquer on dry decal to hold it together. All the troubles are quickly forgotten once I finish the model though.


Decal suggests neon red for Marlboro color scheme, but use lighter fiery red.
5 spoke front wheels to match with rear full disc makes another car sacrificed as donor


Rebuild from a Trofeu, so interior details are well addressed.
However, few items need to be touched up to make conversion complete.
Harness is converted into OMP. Roll cage is black instead of white, as commonly seen.
Matt black window trim is added, as Trofue don't have any.


Heard that the 3rd place is given to Kankkunen by Ponce, who gaining on Kankkunen rapidly at the later part of the rally.
Ponce let Kankkunen use his tyres replacing the fast degarding tyres.
Afterall, Kankkunen is his idol.
I'm not sure how true is that.

Wednesday, May 11, 2011

MITSUBISHI LANCER EVO III ROTHMANS RICHARD BURNS 1996 RALLY NEW ZEALAND

Can't wait to get it done, so near yet so far away.


Hollow internals, just body fitted up with underside.


Notice that even decals on the roof are not yet completed.


Will update when there is progress

Wednesday, April 20, 2011

TOYOTA CELICA GT-FOUR 4WD ST185 MADIT BERTONE CHIAPPONI 1995 EL CORTE INGLES


1995 FIA European Rally Champions, Enrico Bertone.


Won 3 European rallies that year, 26th International Rally Zlatni in Albania, 52nd Rajd Polski and 14th. ADAC Rallye Deutschland.


This car is the one that finished 6th in the19th. Rallye El Corte Inglés


In 1994, the car with almost the same livery won the Rallye Catalunya


Monday, April 18, 2011

MITSUBISHI EVO III WINFIELD RALLIART 1996 SAN REMO DIDIER AURIOL


In the aftermath of 1995 debacles, Didier Auriol participated in only two WRC events in 1996. He drove for Subaru in Sweden and in this magnificient Mitsubishi Evo III in San Remo.


It really was a one-off drive to help Mitsubishi achieve their target to capture Manufacturer’s title as Makinnen already had Driver’s title in the bag at that time.


For the record, the Top Ten result was:

1 MCRAE C. /RINGER D. Subaru Impreza 4:26'57
2 SAINZ C. /MOYA L. Ford Escort Cosworth
3 THIRY B. /PREVOT S. Ford Escort Cosworth
4 LOIX F. /SMEETS S. Toyota Celica ST205
5 ERIKSSON K. /PARMANDER S. Subaru Impreza
6 CUNICO G. /SCALVINI P. Ford Escort Cosworth
7 PIANEZZOLA G. /ROGGIA L. Toyota Celica ST205
8 AURIOL D. /GIRAUDET D. Mitsubishi L.  4'53 behind the winner
9 MEDEGHINI A. /"MEDEGHINI" Subaru Impreza
10 BERNARDINI P. /SAVIGNONI D. Ford Escort Cosworth


Friday, April 1, 2011

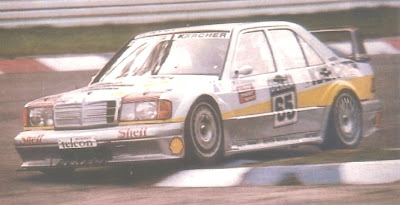
MICHAEL SCHUMACHER'S OTHER NOTABLE RIDES #1 MERCEDES 190E EVO1 KARCHER 1990 DTM


MERCEDES 190E EVO1 KARCHER 1990 DTM


The race he wish to forget, the car not too many remember.
Hockenheim , 14th. October, 1990, the last venue in 1990 DTM calendar.


Right on the first corner, he took out Cecotto who was leading the championship by 18 points. Ceccotto had to restart at the back of the pack and never recovered. Sad enough, Cecotto couldn't catch the Audis in the 2nd race.
As a guest driver and nothing for him to race for, he deservedly drew strong opinions from Cecotto.


So the results were reported to be:
(Heat 1) Qualifying: 15th, Race Proper: DNF
(Heat 2) Qualifying: [15], Race Proper: [DNS]


His venture into motor racing however, has changed by leaps and bounds since then. DTM certainly not his forte, but something bigger is.


Falling down doesn't make you a failure, but staying down does
says a Portuguese proverb.

The same to be adopted by Bama hoopsters who finished second best in the NIT today. Add some parameter shooting next year, they will be for real.


Thursday, March 31, 2011

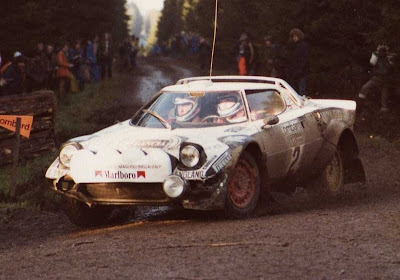
LANCIA STRATOS HF ENGLAND 1979 RAC RALLY MARKKU ALEN

1979 Lombard RAC Rally was the penultimate round in 1979 rally calendar that was won by Hannu Mikkola in Ford Escort RS1800


Markku Alen finished 5th, 16m 45s behind Mikolla despite winning 13 of total 59 stages.

Upon request through so many emails, I try to document the trail of my project, driven by aims to be frugal and time effective, to get a model that looks something like this:


DAY 1
20110330
Dismantling and cannibalizing of factory model


An Altaya base model with donor wheels

First trial on new wheels. Looks good, so the project is 'viable'. Worth to point out that removal of the underside has been skipped! Same goes with the removal of wheels from axles.


The chassis looking from underneath, with all the attachments, which need to be removed


Front end. Surprisingly, no slot holes for headlights and spotlights, making it impossible to detach those parts from the body by pushing them out like I normally do to other models.

Same issue with the rear end, only carplate has holes

Have to use pliers and screwdrivers to tweak them out slowly.

Patience is a virtue, so as not to damage or break these fragile parts. Do always cushion the lift off of smaller parts like side mirror, antenna etc, as they can literally fly away once you flick them

Almost all plastic parts are detached. The hardest part to detach is the glazed plastic window / wind screen which tend to crack when it is forced out of its rivet. I normally insert a thin screwdriver between the roof and the plastic piece and prise it slowly while keeping an eye on the crack at riveted area. Cracks are unavoidable but can be managed by slowing the act of prising.

Best part about customizing or coverting an Altaya is that the glue and jointing of these parts to the body is not that strong. It minimizes damages to these part as minimal force is exerted to them during the process.

Enter the Tiger! This is my choice of paint strippers, chaep, fast and effective. There are many to choose from, acetone, turpentine and other hydrocarbon oil. Please note almost all paint stripper are toxic and flammable. So please read the label first.
 
This takes about 1/2 hour of soaking, all the paints seem to be lifted from the based metal. However, I continue to soak a bit longer for crevices and previously glued areas.

The end result.
Wipe all the thinner off and let it completely dry, then time to file away those excess cast lines and fill the dents with putty, if any.


DAY 2
Repainting and making good

After layers of primer and white topcoats, ready to paint black on bottom half.


Being minimalist, I instead use normal masking Loytape to cover white portion.

This time I use Tamiya aerosol spray. My trusted Badger needs some repairs. Paint looks like a bit excessive, signified by orange peels appearance. That’s normal with aerosol, it can be rectified by applying polishing compound.

While waiting to get paint completely cured, I normally moved on to other parts.


On windscreen, original decals are removed using non-acetone cutex remover so as not to ‘frost’ the acrylic.  Use cotton buds with gentle wipes on the windscreen, I can’t go wrong.
Then the chassis is ready for decaling now. But before that, I always like to trace the door lines to make model look more functional. Rubber trim on the windows also make model extra nicer

For that I use thin oil, the best for me is turpentine added to paint pre-mixed with thinner. Let it be very thin and use tip of the brush to drop into crevices of door, bonnets, grilles etc. The thin oil will flow inside the crevices and propagate along the line

Yes, it will smear and spoilt the paint, but for a moment. Let it be that way and let it dry.

Once dried, I buff off the spoilt areas with Autosol.  The surface above crevices will be clean, leaving the crevices with black paint. That produces tiny line that cannot be achieved by normal painting.


DAY 3
Finish Line

So here is the decal. I have heaps of decals that I need photo albums to catalogue and safe keep them from climate. Lucky these days photo albums are sold cheaper by hours.


Decalling is the best part of modeling, but need to be extra careful to get correct positioning.Off course, need to let the decal fully dry, I normally start the gloss lacquer coating a day or two thereafter.
While waiting, these tyres need to be cleaned, as normally the case for factory completed model
As this car uses Perrili, I need to remove original tyre marking and remove the waxy paint inside the tyres. Normal thinner can do this job fairly easy.
So skipping almost all the re-assembly works, which are in reverse to dismantling before, I got it almost done. Notice the nightlight and side mirror are not fixed yet.

Small winglets on the chins, and mud flaps are threw in to make it as close as actual car.

Worth to mention, blind (grilles) on the rear windscreen require additional black strip decal. Otherwise, it can be carefully painted.


At the end, here I have a decent model, not of the top master craftsman finishing, but to me comparable to any factory model.
Heard that Minichamps is going to produce this same car in the very near future, and pre-orders are already accepted by some dealers.
And remember, you have seen it here first.