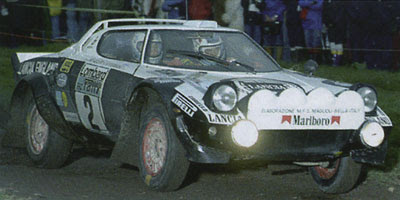
1979 Lombard RAC Rally was the penultimate round in 1979 rally calendar that was won by Hannu Mikkola in Ford Escort RS1800
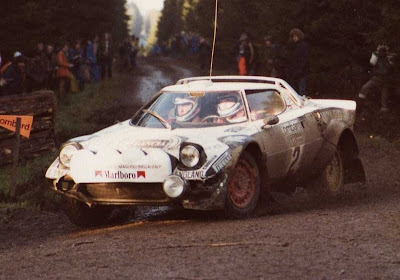


Markku Alen finished 5th, 16m 45s behind Mikolla despite winning 13 of total 59 stages.
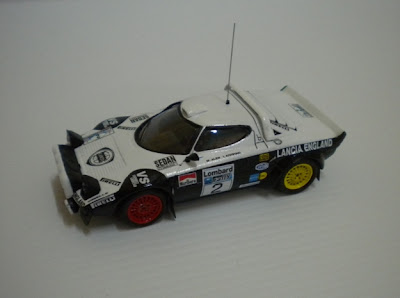
Upon request through so many emails, I try to document the trail of my project, driven by aims to be frugal and time effective, to get a model that looks something like this:

DAY 1
20110330
Dismantling and cannibalizing of factory model

An Altaya base model with donor wheels

First trial on new wheels. Looks good, so the project is 'viable'. Worth to point out that removal of the underside has been skipped! Same goes with the removal of wheels from axles.

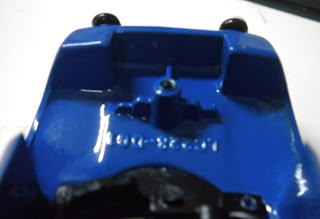
The chassis looking from underneath, with all the attachments, which need to be removed
Front end. Surprisingly, no slot holes for headlights and spotlights, making it impossible to detach those parts from the body by pushing them out like I normally do to other models.

Same issue with the rear end, only carplate has holes

Have to use pliers and screwdrivers to tweak them out slowly.

Patience is a virtue, so as not to damage or break these fragile parts. Do always cushion the lift off of smaller parts like side mirror, antenna etc, as they can literally fly away once you flick them

Almost all plastic parts are detached. The hardest part to detach is the glazed plastic window / wind screen which tend to crack when it is forced out of its rivet. I normally insert a thin screwdriver between the roof and the plastic piece and prise it slowly while keeping an eye on the crack at riveted area. Cracks are unavoidable but can be managed by slowing the act of prising.

Best part about customizing or coverting an Altaya is that the glue and jointing of these parts to the body is not that strong. It minimizes damages to these part as minimal force is exerted to them during the process.

Enter the Tiger! This is my choice of paint strippers, chaep, fast and effective. There are many to choose from, acetone, turpentine and other hydrocarbon oil. Please note almost all paint stripper are toxic and flammable. So please read the label first.

This takes about 1/2 hour of soaking, all the paints seem to be lifted from the based metal. However, I continue to soak a bit longer for crevices and previously glued areas.

The end result.
Wipe all the thinner off and let it completely dry, then time to file away those excess cast lines and fill the dents with putty, if any.
DAY 2
Repainting and making good

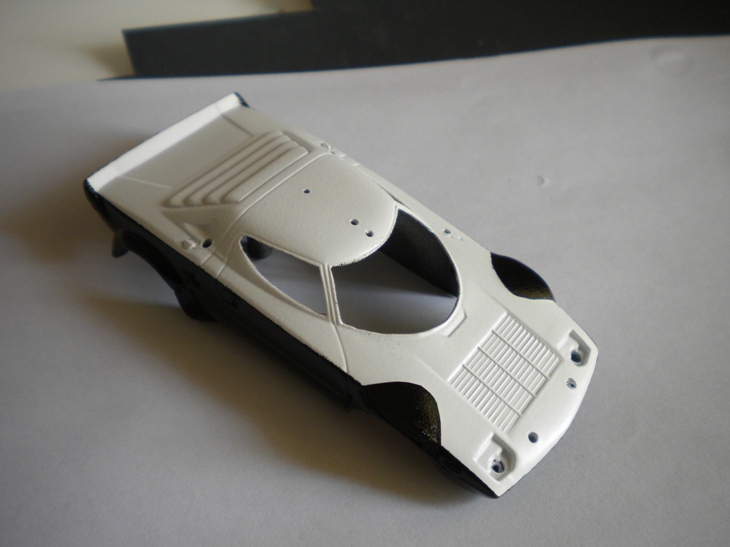
After layers of primer and white topcoats, ready to paint black on bottom half.

Being minimalist, I instead use normal masking Loytape to cover white portion.

Being minimalist, I instead use normal masking Loytape to cover white portion.

This time I use Tamiya aerosol spray. My trusted Badger needs some repairs. Paint looks like a bit excessive, signified by orange peels appearance. That’s normal with aerosol, it can be rectified by applying polishing compound.

While waiting to get paint completely cured, I normally moved on to other parts.

On windscreen, original decals are removed using non-acetone cutex remover so as not to ‘frost’ the acrylic. Use cotton buds with gentle wipes on the windscreen, I can’t go wrong.
Then the chassis is ready for decaling now. But before that, I always like to trace the door lines to make model look more functional. Rubber trim on the windows also make model extra nicer

For that I use thin oil, the best for me is turpentine added to paint pre-mixed with thinner. Let it be very thin and use tip of the brush to drop into crevices of door, bonnets, grilles etc. The thin oil will flow inside the crevices and propagate along the line

Yes, it will smear and spoilt the paint, but for a moment. Let it be that way and let it dry.

Once dried, I buff off the spoilt areas with Autosol. The surface above crevices will be clean, leaving the crevices with black paint. That produces tiny line that cannot be achieved by normal painting.
DAY 3
Finish Line

So here is the decal. I have heaps of decals that I need photo albums to catalogue and safe keep them from climate. Lucky these days photo albums are sold cheaper by hours.

Decalling is the best part of modeling, but need to be extra careful to get correct positioning.Off course, need to let the decal fully dry, I normally start the gloss lacquer coating a day or two thereafter.

While waiting, these tyres need to be cleaned, as normally the case for factory completed model

As this car uses Perrili, I need to remove original tyre marking and remove the waxy paint inside the tyres. Normal thinner can do this job fairly easy.

So skipping almost all the re-assembly works, which are in reverse to dismantling before, I got it almost done. Notice the nightlight and side mirror are not fixed yet.


Small winglets on the chins, and mud flaps are threw in to make it as close as actual car.

Worth to mention, blind (grilles) on the rear windscreen require additional black strip decal. Otherwise, it can be carefully painted.

At the end, here I have a decent model, not of the top master craftsman finishing, but to me comparable to any factory model.
Heard that Minichamps is going to produce this same car in the very near future, and pre-orders are already accepted by some dealers.
And remember, you have seen it here first.
And remember, you have seen it here first.
No comments:
Post a Comment